Installation
Blender 4.2 +
-
Go to
Edit >
 Preferences.
- Click the Add-ons tab.
-
Click the
 Add-ons Settings button on the top right corner of the window.
- Click Install from Disk.
- Select The_3DMage_AddonWrangler.zip and then click Install from Disk.
-
Click the
Add-ons Settings button again on the top right corner of the window.
- Click Install from Disk.
- Select Figaro.zip and then click Install from Disk.
- Save your preferences.
Blender 4.1
-
Go to
Edit >
Preferences.
- Click the Add-ons tab.
-
Click the
 Install button.
- Select The_3DMage_AddonWrangler.zip and then click Install Add-on.
- Enable System: 3D Mage Addon Wrangler if not already enabled.
-
Click the
Install button again.
- Select Figaro.zip and then click Install Add-on.
- Enable Mesh: Figaro if not already enabled.
- Save your preferences.
Quick Start
- In Object Mode, open the Figaro Side Panel menu by clicking the Figaro tab.
- Click Create Figaro Object to create a new Figaro object. Make sure it is selected.
-
Go to Edit Mode:
- Extend edges and fill faces to build a shape.
- Press Shift + R on selected vertices to enter Radius Mode:
- Move mouse right to increase radius.
- Move mouse left to decrease radius.
- Left-click or press Enter to confirm.
- Right-click or press Esc to cancel.
-
When the Figaro object is finished, go to Object Mode and in the side panel menu, convert the object to a mesh either by:
- Clicking Convert to Voxel Mesh for a voxel-based model.
- Clicking Convert to Mesh for a standard mesh.
Object Mode Operations
Create Figaro Objects
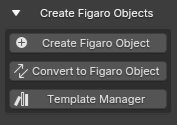
- Create Figaro Object — Spawns a new Figaro object at the 3D cursor.
- Convert to Figaro Object — Converts selected objects into Figaro objects.
- Template Manager — Opens the Template Manager menu.
Template Manager
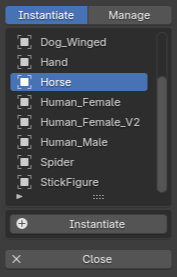
- Template List — List of saved Figaro templates. Click on an entry to set the currently selected template to spawn or update.
- Modes — Switches between Instantiate and Manage.
Instantiate Mode

- Instantiate — Creates a new instance of the selected Figaro template from the Template List.
Manage Mode

- Update Template — Updates the selected template in Template List to the current active selected Figaro object.
- Add New Template — Adds currently active selected Figaro object in the scene to the Template List as a new template.
- Remove Template — Removes the selected template from the Template List.
- Close — Closes the Template Manager.
Convert to Mesh
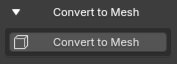
- Convert to Mesh — Converts the selected Figaro objects into meshes as they appear in the scene. The original Figaro objects are preserved and hidden.
Convert to Voxel Mesh
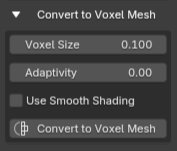
- Voxel Size — Size of the voxels that will make up the voxelized mesh. Smaller values result in finer detail.
- Adaptivity — Controls how uniform the voxels are. The higher the adaptivity, the more the resulting voxelization will use simplification methods to represent less detailed areas more efficiently.
- Use Smooth Shading — Controls whether to apply smooth shading to the voxelized mesh.
- Convert to Voxel Mesh — Converts the selected Figaro objects into voxelized meshes. The original Figaro objects are preserved and hidden.
Display Options
Display Color Options
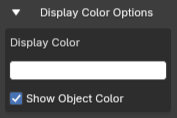
- Display Color — Sets the object color shown in the viewport Solid shading mode.
- Show Object Color — Toggles whether to show object colors or not.
Material Options
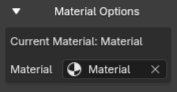
- Material — Sets current material assigned to the Figaro object.
Geometry Options
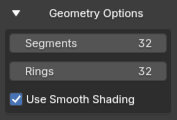
- Segments — Controls the number of longitudinal edges around spheres and cylinders.
- Rings — Controls the number of latitudinal edges around spheres.
- Use Smooth Shading — Toggles whether to apply smooth shading to the Figaro object.
Subdivision Level
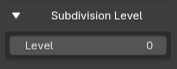
- Level — Sets how many times to subdivide the input edges and faces that constitute the Figaro object. Note that this is not subdividing the resulting geometry generated by the Figaro geometry node.
Attach Target
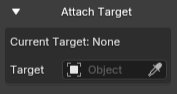
- Target — Sets which object to shrink wrap geometry around. This will utilize the modifier's subdivision functionality as well.
Manual Apply

- Manual Apply — Toggles whether to non-destructively convert the generated geometry by the Figaro geometry node as if the modifier was applied. It is the equivalent to using the Convert to Mesh operation.
Remove Figaro Properties
- Remove Figaro Properties — Removes the object and vertex properties and the corresponding geometry node of the selected Figaro objects.
Edit Mode Operations
Selected Vertex Radii
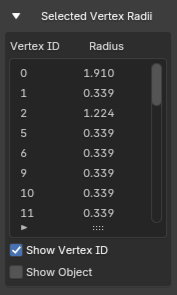
- Selected Vertices List — Displays a list of the selected vertices with additional information such as radius, vertex ID, and root object.
- Show Vertex ID — Toggles whether to display the Vertex ID column in Selected Vertices List.
- Show Object — Toggles whether to display the root object column in Selected Vertices List.
Radius Options
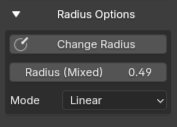
- Change Radius — Activates Radius Mode for the selected vertices.
- Radius — Sets the radius of the selected vertices.
- Mode — Toggles the current Resize Mode to use while in Radius Mode.
- Linear — Changes radius by adding a constant value to each radius.
- Proportional — Changes radius by multiplying a constant value to each radius.
Radius Mode
Basics
To activate Radius Mode, select vertices then press Shift + R.
Move the mouse right to increase the radius.
Move the mouse left to decrease the radius.
Operations
- ~ — Resets the sensitivity value to the default value.
- M — Toggles which Resize Mode to use.
- Enter / LMB — Applies the change to the radii of selected vertices and exits Radius Mode.
- Esc / RMB — Exits Radius Mode without changing any of the radii.
- Ctrl + Shift + MMB-scroll — Adjusts the sensitivity value. Scroll up to increase the sensitivity, scroll down to decrease the sensitivity.
Vertex Sharpness
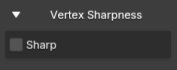
- Sharp — Marks if a vertex should make neighboring edges conform to the underlying edge rather curve when using subdivision levels.
Subdivision Level

- Level — How many times to subdivide the input edges and faces that constitute the Figaro object. Note that this is not subdividing the resulting geometry generated by the Figaro geometry node.
Split & Pull Options
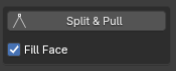
- Split & Pull — Activates Split & Pull Mode. This option only shows up if a single vertex that is the end of an edge not connected to other edges is selected.
- Fill Face — Sets whether to fill space between split edges with a face.
Split & Pull Mode
Basics
To activate Split & Pull Mode, select a vertex that is the end of an edge and not connected to any other edges, then press Shift + U.
Move the mouse to change the split distance.
Operations
- ~ — Resets the sensitivity value to the default value.
- M — Toggles Fill Face option.
- Enter / LMB — Applies the split and exits Split & Pull Mode.
- Esc / RMB — Exits Split & Pull Mode without changing any of the radii.
- Ctrl + Shift + MMB-scroll — Adjusts the sensitivity value. Scroll up to increase the sensitivity, scroll down to decrease the sensitivity.
Manual Apply

- Manual Apply — Toggles whether to non-destructively convert the generated geometry by the Figaro geometry node as if the modifier was applied. It is the equivalent to using the Convert to Mesh operation.
Sensitivity Options
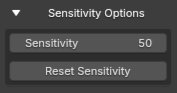
- Sensitivity — Controls how fast the radius changes in Radius Mode.
- Reset Sensitivity — Restores the sensitivity to its default value.
Display Options
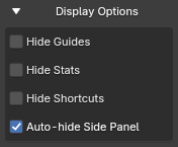
- Hide Guides — Hides the red/green circle that follows the mouse while in Radius Mode.
- Hide Stats — Hides the stats that appear on bottom left corner while in Radius Mode.
- Hide Shortcuts — Hides the shortcut key guide that appears on bottom right corner while in Radius Mode.
- Auto-hide Side Panel — Temporarily hides the side panel while in Radius Mode or Split & Pull Mode.
Add-On Configurations
Change-Radius Hotkey
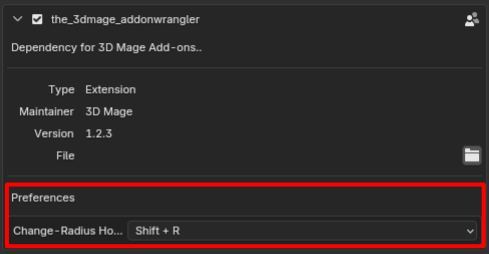
- Hotkey Choices — Sets which hotkey to use for activating Radius Mode. The options are: Shift + R, Ctrl + A, or Alt + S.
Factory Reset Template Manager
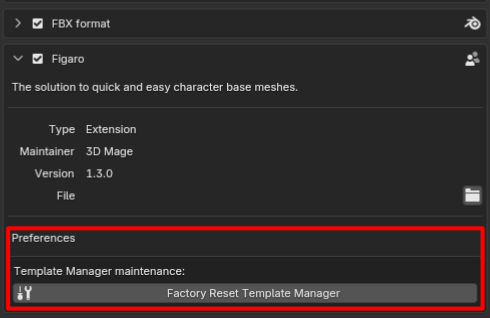
- Factory Reset Template Manager — Resets the default templates found in the Template Manager to their original state. This will not delete any existing user-made templates.